Savory Sweet Potato Casserole (Holiday Side Dish Idea!)
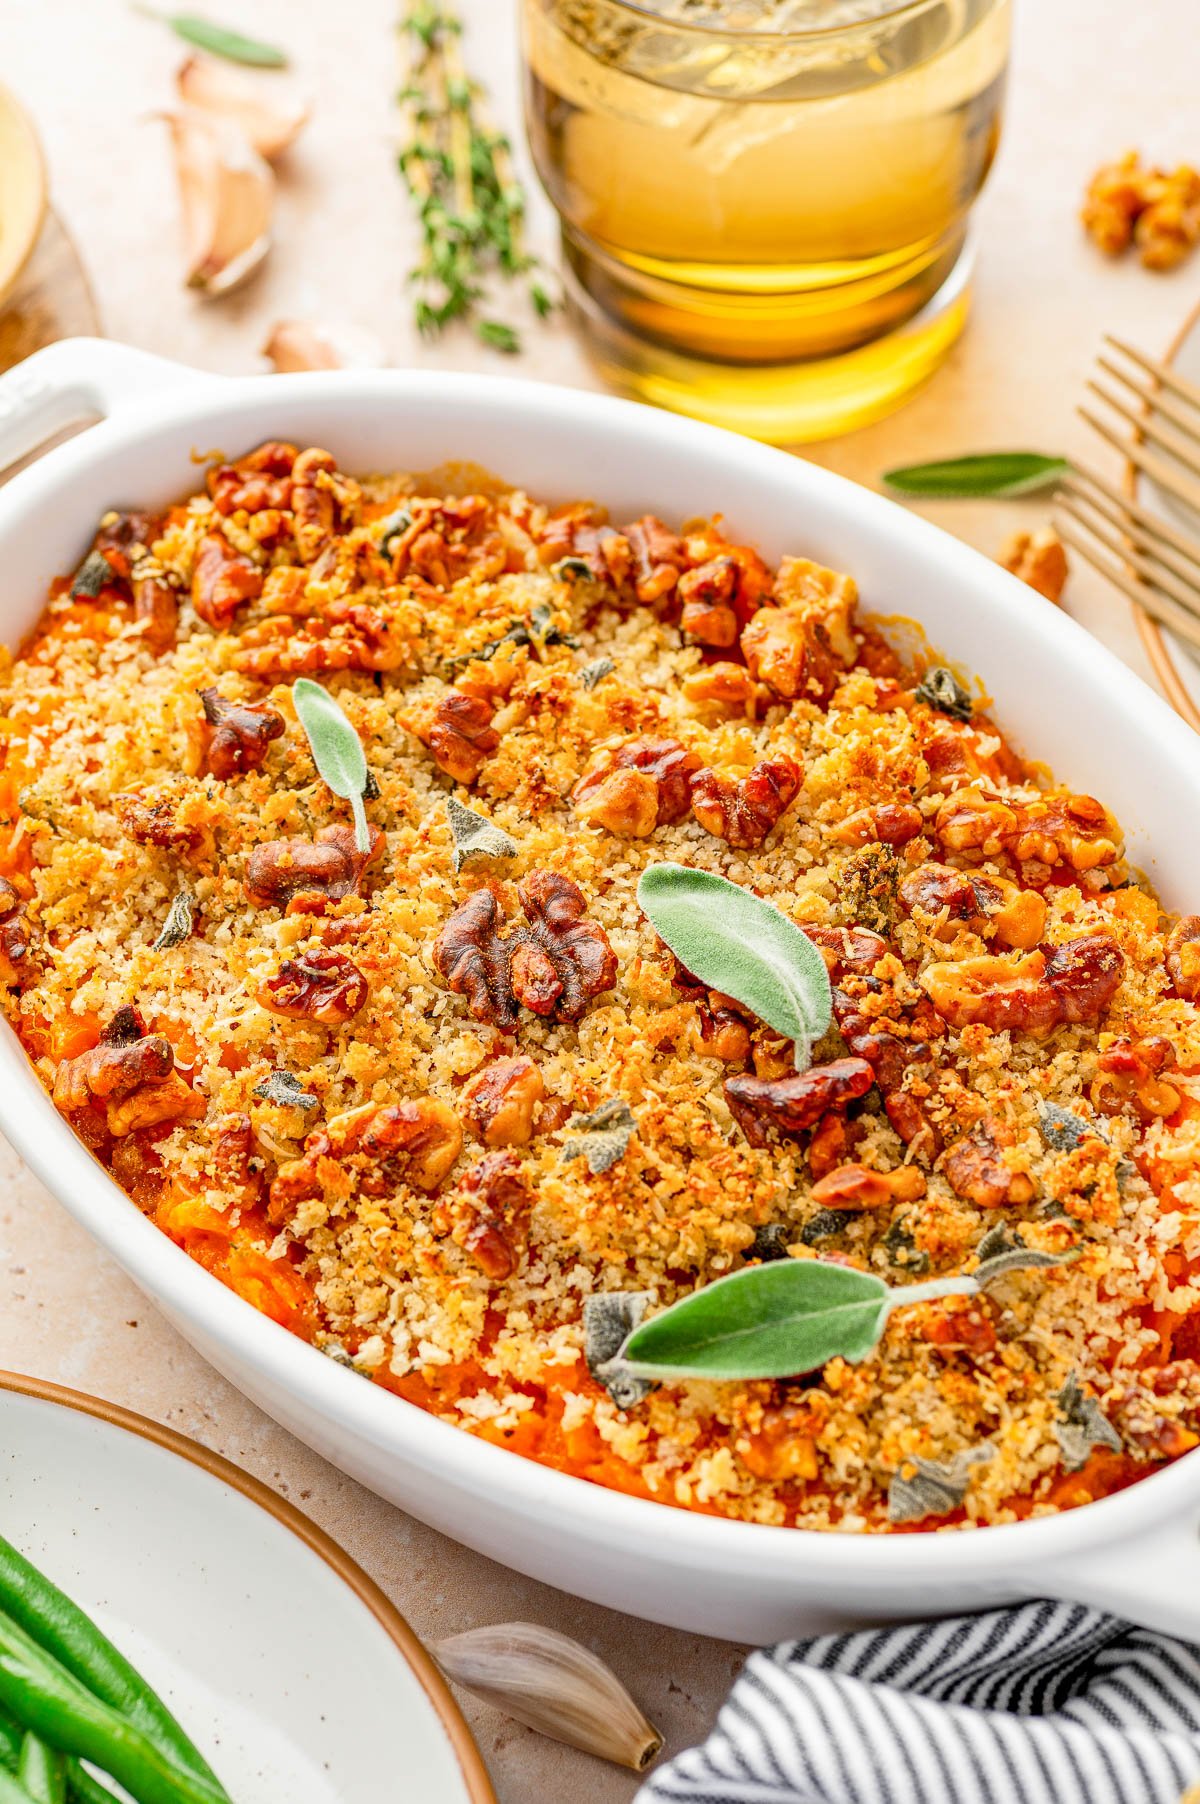
Savory Sweet Potato Casserole 🍠🍁 with creamy sweet potatoes and a crispy Parmesan, walnut, and breadcrumb topping is an exciting savory twist to the classic casserole! Put this stunning side dish on your holiday menu for Thanksgiving, Christmas, and holiday entertaining!

Easy Savory Sweet Potato Casserole Recipe
- My favorite Thanksgiving side dish is sweet potato casserole and I’ve got plenty of variations: With a butter pecan crumble (my most popular and what I think of as traditional sweet potato casserole), with marshmallows on top, with candied bacon, and more. But I couldn’t resist another variety.
- This version incorporates a base of creamy mashed sweet potatoes that are topped with a crispy and lightly crunchy topping.
- The topping is a mixture of buttery panko breadcrumbs, walnuts, Parmesan cheese, and sage which creates a beautiful golden top that’s perfectly crunchy and such a wonderful contrast the creamy smooth sweet potatoes below.
- You can also make this sweet potato casserole with savory topping ahead of time. Consult the recipe card for the details. If you’re going to serve this side dish for your Thanksgiving meal, for Christmas, or for a special fall or winter event, it’s nice to be able to prep this and get it ready to bake off so that on the day-of, your stress levels are reduced!


Ingredients in Savory Sweet Potato Casserole and Topping
Base: The base layer consists of mashed sweet potatoes, Parmesan, heavy cream, butter, and a variety of seasonings. I bake these sweet potatoes but you can also boil them. While you could leave the skins on the sweet potatoes, I don’t because I want a very smooth texture. Also this is an egg-free sweet potato casserole.
Topping: A mixture of chopped walnuts (toast them if you’d like), grated Parmesan cheese, panko breadcrumbs, melted butter, fresh sage, salt, and pepper. Make sure to use panko breadcrumbs rather than traditional breadcrumbs so your topping crisps up nicely.
Garnishes: I use sage but you can use thyme since it’s already in the casserole base, or try parsley, rosemary, green onions, crispy shallots, or your favorites for flavor.
Note: Scroll down to the recipe card section of the post for the ingredients with amounts included and for more complete directions.


How to Make Savory Sweet Potato Casserole
- Cook the Sweet Potatoes: I baked my sweet potatoes for this casserole, although you can boil them noting that you’ll have a wetter casserole since boiling = water-logged potatoes.
- Cut and Combine: Halve the baked sweet potatoes, scoop out the flesh, and combine it with various ingredients including Parm, cream, butter, and seasonings.
- Mash and Spread: Use a wooden spoon potato masher to mash the potatoes and combine the ingredients. You can use an electric mixer if you prefer although frankly I don’t think it’s necessary. Spread the sweet potato mixture in a 2.5 quart casserole dish. Tip: If you’re making this in advance, stop now, cover and refrigerate.
- Topping: Combine melted butter, nuts, panko, Parm, stir to combine, and then sprinkle it evenly over the sweet potatoes.
- Bake, Garnish, and Serve: Bake in a preheated oven for about 20-25 minutes or until the top is golden brown, garnish with a pinch of your favorite herbs, and serve!
-
potato masher optional (or use a wooden spoon for rustic texture; or electric mixer for very smooth texture)
- Sweet Potato Base – Preheat oven to 400F, scrub the sweet potatoes well, and puncture them with a fork in a few places. Bake the potatoes for about 45 to 60 minutes, or until very soft and tender. Notes – Baking time will range based on size of potatoes. Jumbo sweet potatoes could take a bit longer than an hour to fully bake through. I have boiled sweet potatoes for other sweet potato casserole recipes and that’s an option, noting that the base layer will be wetter.
- Allow the potatoes to cool enough to handle them (put on a pair of rubber gloves if you can’t wait), slice them in half vertically, and scoop out the flesh into a large bowl, and discard the skins. Note – For texture reasons, I would not include sweet potato skins (peels) in the base layer since the skins are quite tough and impossible to really blend into a smooth texture.
- To the large bowl with the sweet potato flesh, add all the remaining ingredients from the Sweet Potato Base section, above.
- Stir everything together with a wooden spoon or potato masher. Tips – For a smoother puree, you can beat with a handheld electric mixer. For an ultra smooth puree, you can process everything in the canister of a food process. Personally, I use a wooden spoon.
-
Transfer the mixture into a 2.5-quart baking dish (or similar) that’s been sprayed with cooking spray, and smooth the top lightly with a spatula. Set aside.If you’re making this in advance, stop now, cover tightly with plastic wrap or foil, and refrigerate for up to 24-36 hours. When you’re ready to bake this off, remove it from the fridge, allow it to sit on your counter for at least 30-60 minutes to come up to room temp. Don’t put a cold casserole into the oven because it’ll really extend the amount of time you’ll need to bake it. Proceed with the rest of the recipe below when you’re ready to bake it.
-
Topping – Turn the oven heat to 375F. If desired, toast the nuts in a dry skillet over low heat, tossing them constantly for 1-2 minutes, or until fragrant, taking care not to burn them.
- Add the nuts and all remaining ingredients from the Topping section, above to a medium bowl and toss with a spoon to combine.
-
Evenly sprinkle the topping over the sweet potato base, and bake uncovered for about 20-25 minutes, or until the top is golden and crisp. Baking Tips – Since all ovens vary in their heat output, make sure to start checking after about 16-18 minutes so you don’t accidentally burn the topping. I like to rotate my baking dish once midway through cookings. Optional – If you know how to broil and are confident you can do it without burning the whole thing, you can broil it for 1-2 minutes (I do it on the middle rack and don’t move it up to the top). Broiling will provide extra crunch, but if you’re not an experienced cook, don’t broil. There’s more risk of you burning the whole thing in the final 90 seconds than it’s really worth!
- Garnishes – Optionally garnish with fresh herbs and serve immediately.
Storage: Leftovers will keep airtight in the fridge for up to 5 days or in the freezer for up to 3 months. Note that no matter how you try to reheat this, the topping will not be crispy and crunchy after it’s been refrigerated or frozen. For ease, I reheat it gently in my microwave although you could warm it in the oven.
Serving: 1serving, Calories: 420cal, Carbohydrates: 46g, Protein: 9g, Fat: 23g, Saturated Fat: 11g, Polyunsaturated Fat: 5g, Monounsaturated Fat: 5g, Trans Fat: 0.4g, Cholesterol: 47mg, Sodium: 848mg, Potassium: 741mg, Fiber: 7g, Sugar: 9g, Vitamin A: 27460IU, Vitamin C: 6mg, Calcium: 203mg, Iron: 2mg